Products
Solutions
Resources
9977 N 90th Street, Suite 250 Scottsdale, AZ 85258 | 1-800-637-7496
© 2024 InEight, Inc. All Rights Reserved | Privacy Statement | Terms of Service | Cookie Policy | Do not sell/share my information

On the Project home screen, select Control > Workspaces.
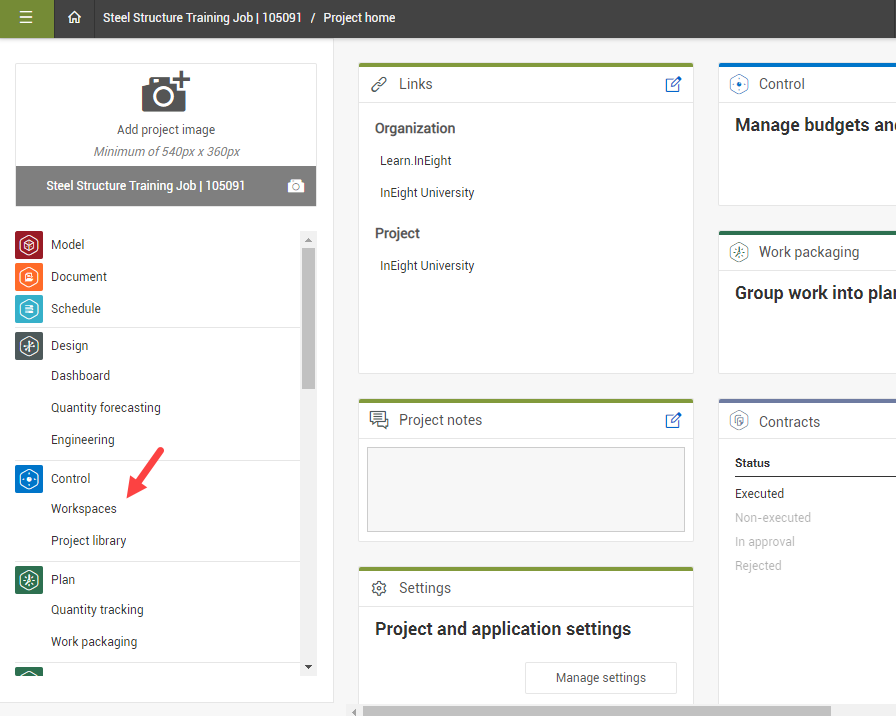
This brings you to the Workspaces page within the Control application
On the Pay Items tab, click and hold any column.
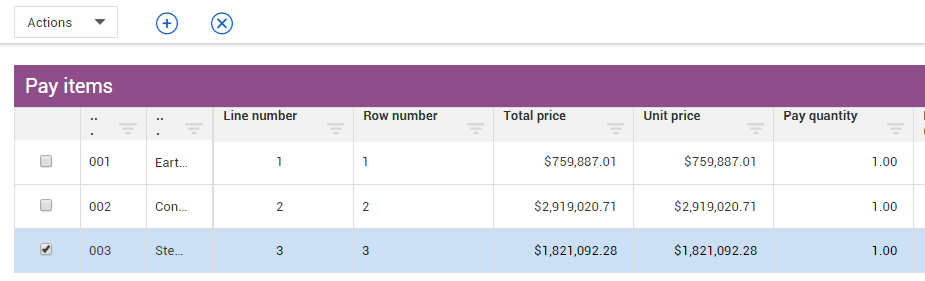
Drag it to the left of right of another column.
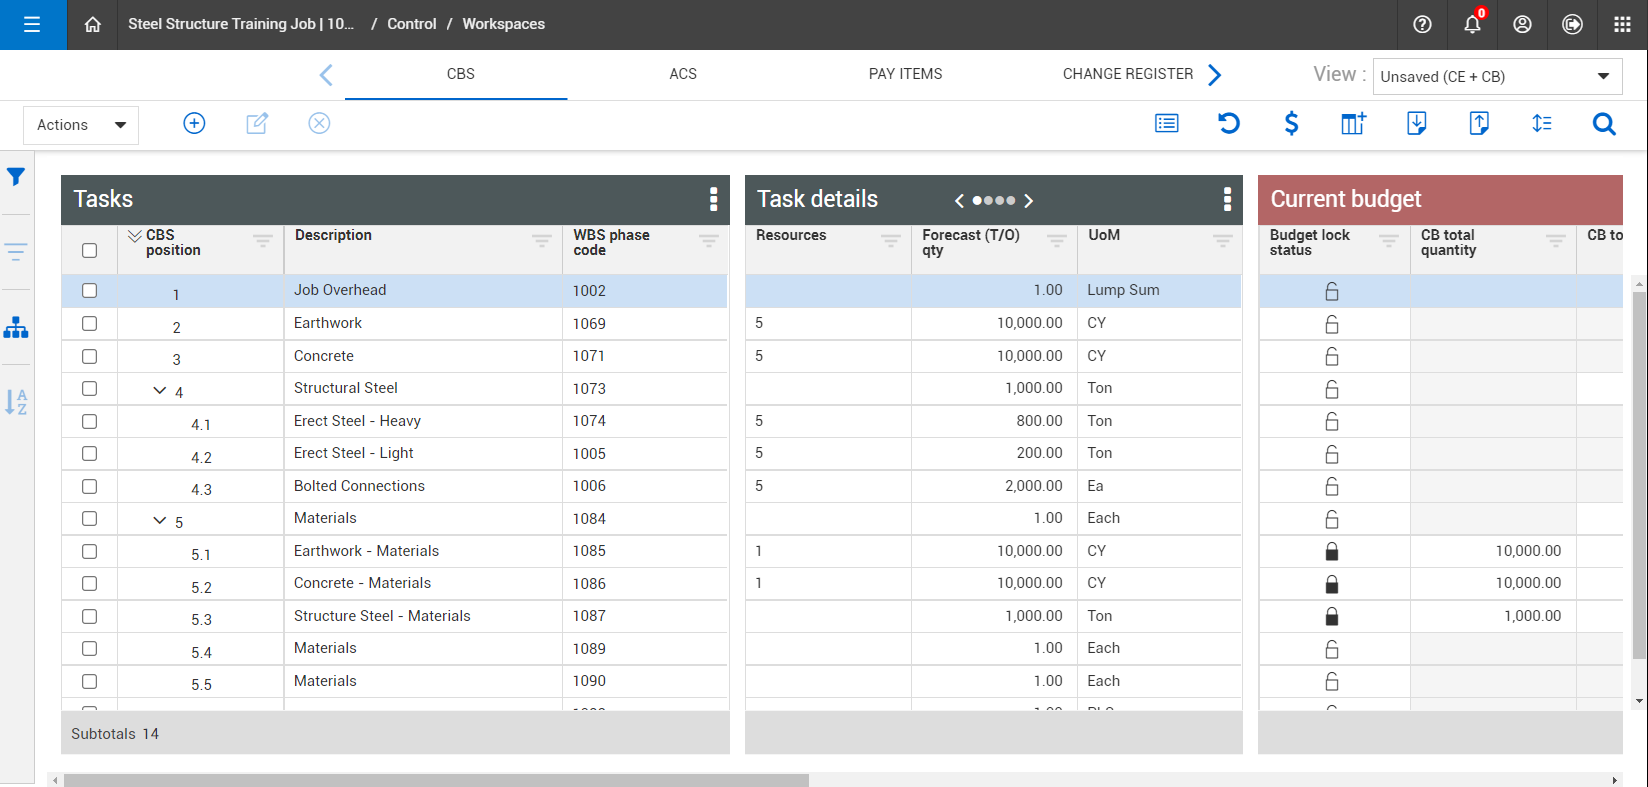
On the CBS tab, select any column header.
A yellow arrow appears, facing downward, indicating that you are sorting that column alphabetically from A-Z or numerically.
To revert the sort, select the column header again.
The yellow arrow faces upward indicating the reverse sort.
Select the column header once more to return the column to the original sort.
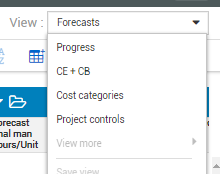
From the CBS tab of the Control Workspaces page, click on the View drop-down arrow.
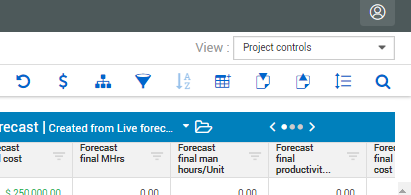
Select the Project controls viewset.
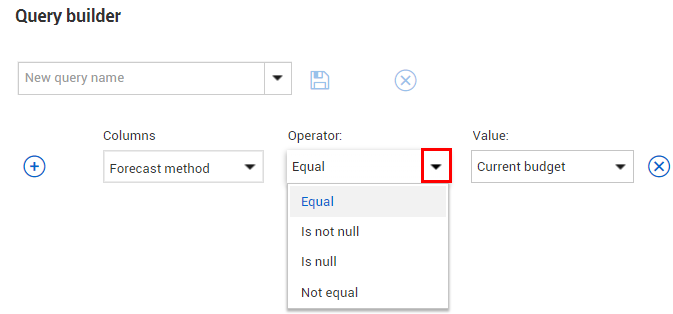
Select the Filter, then Query icon from the left toolbar.
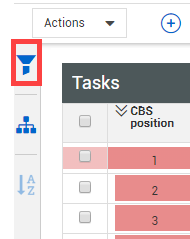
The Query builder slide out panel appears
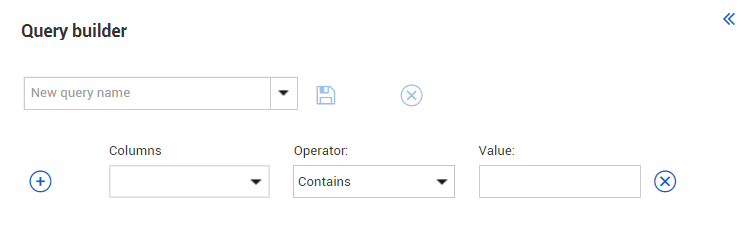
Click on the Columns drop-down arrow to select a column.
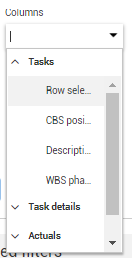
Notice that the column titles are grouped by the data block in which they are housed
Select the Forecast Method column.
This can also be typed into the text box to search for the column you need
Click on the Operator drop-down arrow and select Equal.
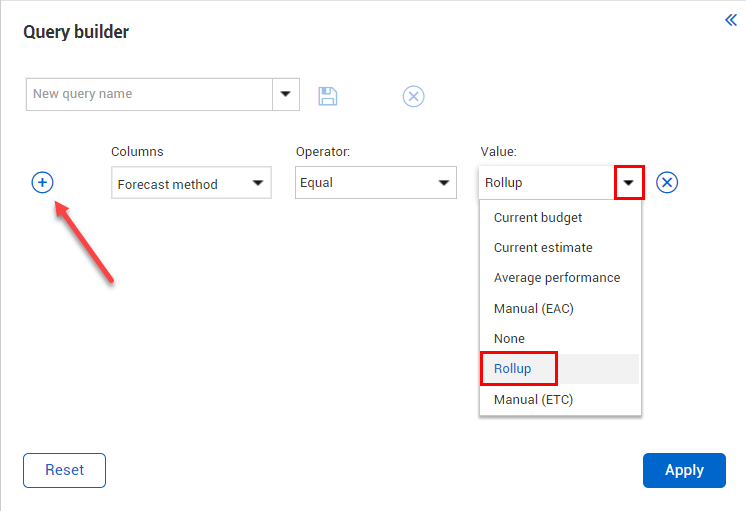
Click on the Value drop-down arrow and select Rollup.
Note that you can add additional filter criteria by clicking the plus icon
Note that you can click Save to add the filter to the My saved filter section for future use
Click Apply to apply the filter.
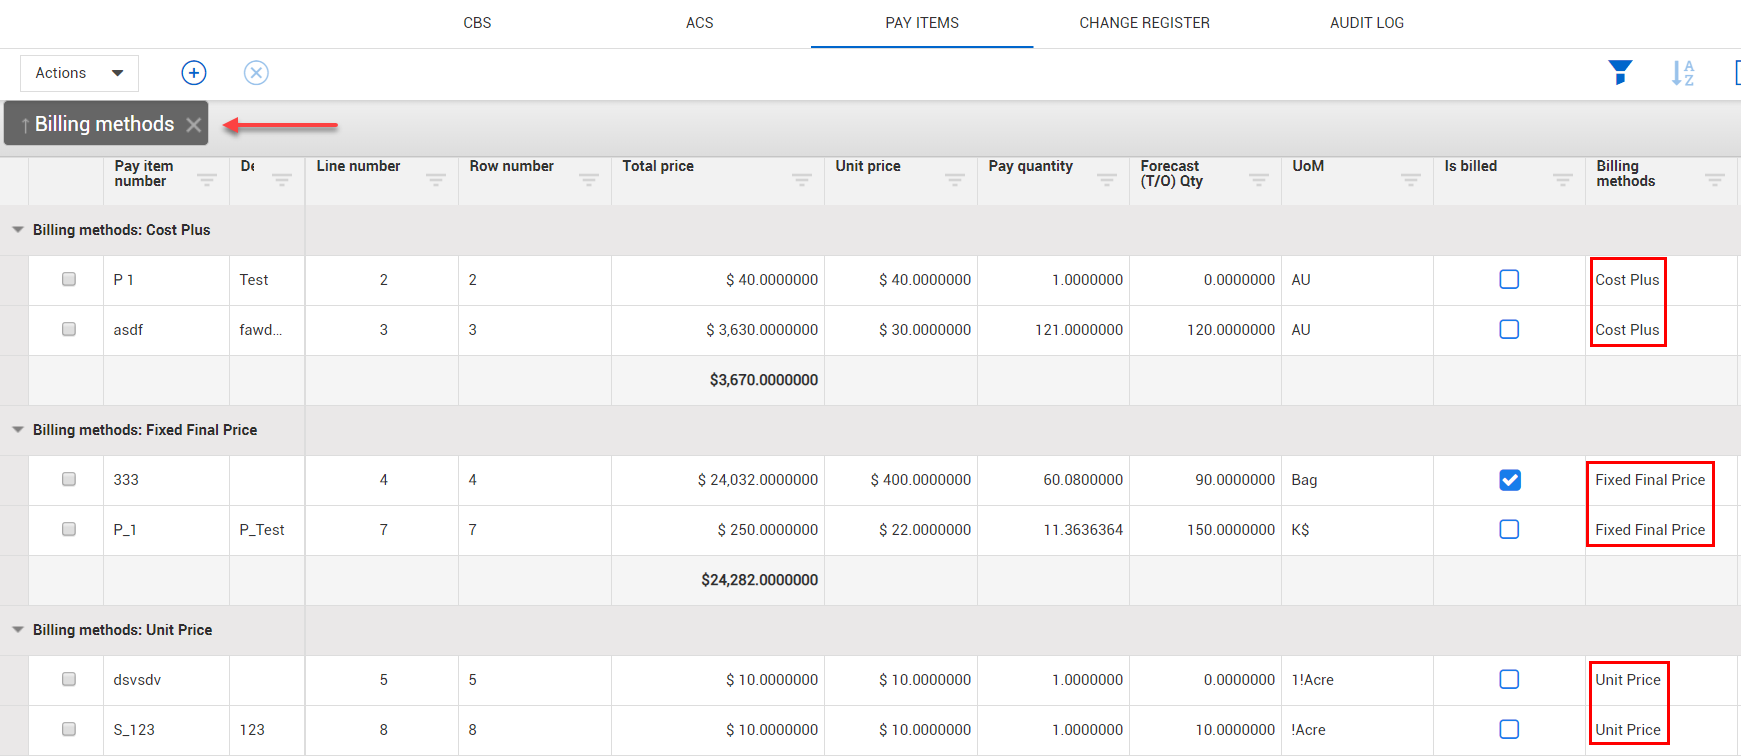
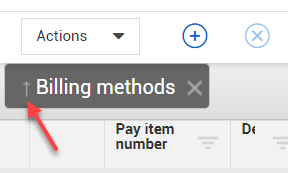
From the Pay Items tab of the Control Workspaces page, click and drag the Billing methods column header, and drop it in the space above.
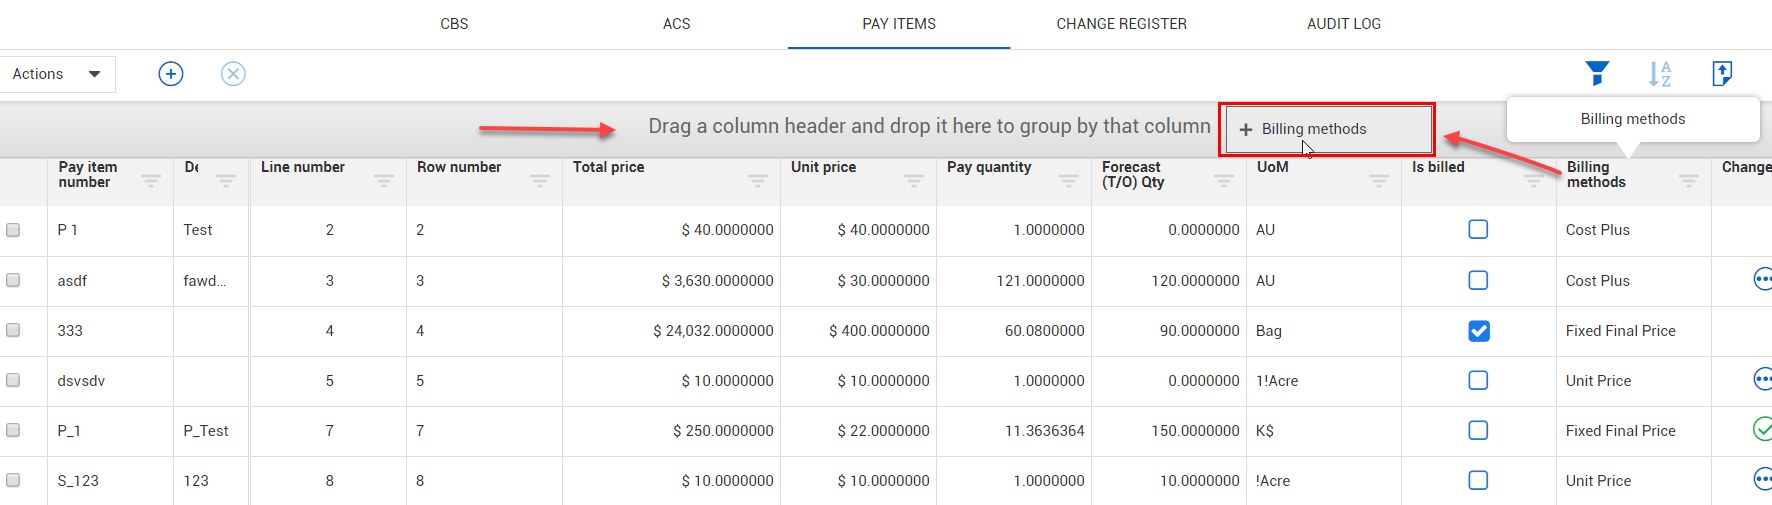
Your Pay Items are now grouped by Billing methods
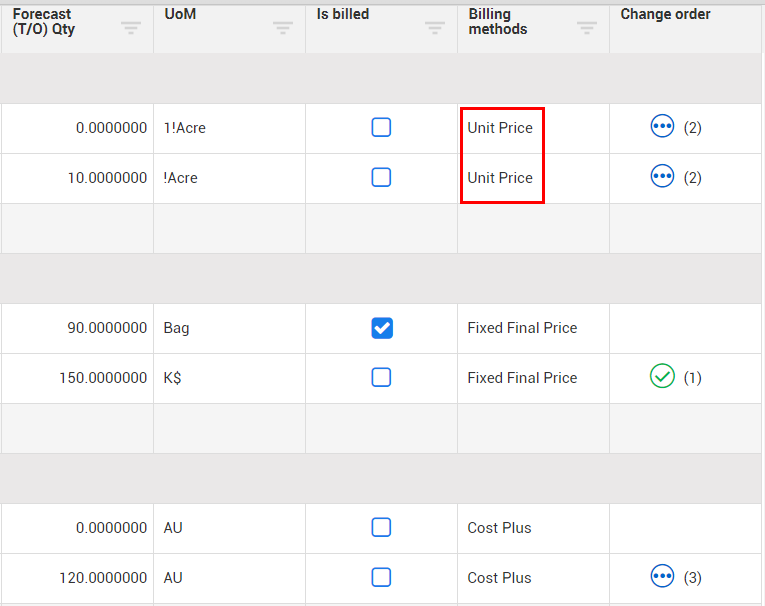
Click on the sort arrow to the left of Billing methods column header to reverse the order of the sort grouping.
Your Billing methods are now sorted, and the Unit Price displays as the first Billing Methods grouping
On the CBS tab of the Workspaces page, click on the Add data block button on the right toolbar to open the Data block slide out panel.

On the slide out panel on the left, drag and drop the Cost categories: CB data block into the register page on the right.
Each view holds a maximum of five data blocks.
This will drop the data block at the very far right side and you can then move it via
drag and drop in the register

You can view currently active project data blocks by either a thumbnail or list.
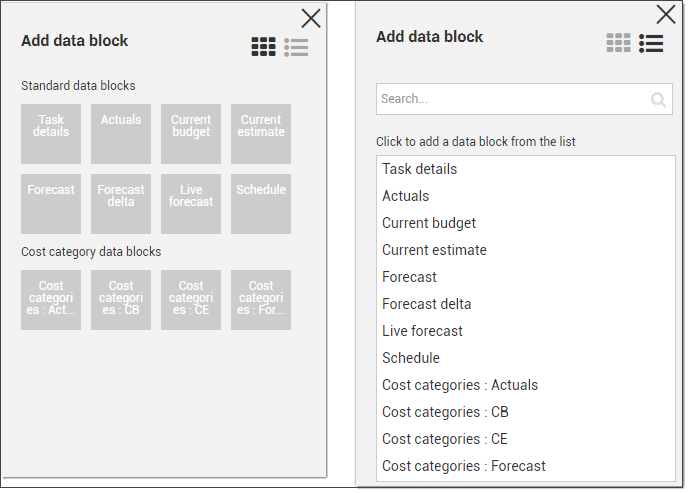
On the CBS register page, click on the Add data block button, to open the data block slide out panel.
At the bottom of the Data Block menu, select Create custom data blocks.
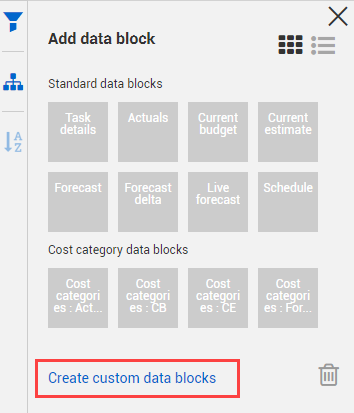
Select Data Block Type: General.
In the Data block title, enter in [your initials] Training – Unit Cost.
Select Next.
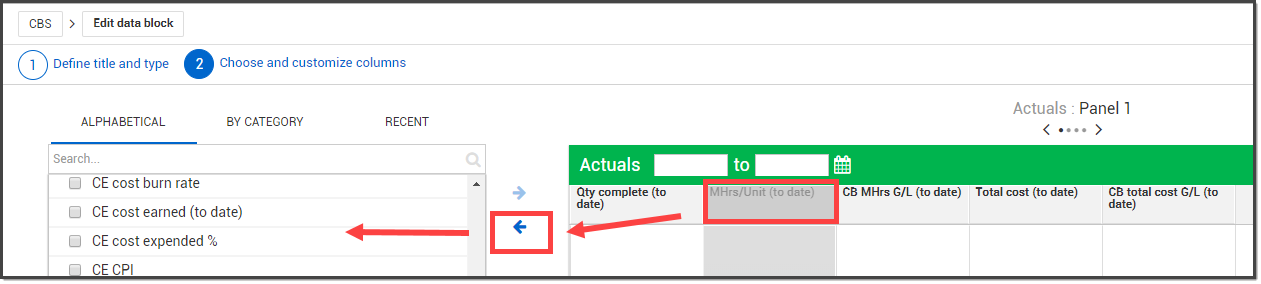
Using one of the methods above, add the following columns to the data block on the right:
Unit Cost (To Date)
CE Unit Cost (To Date)
Forecast Remaining Unit Cost
Forecast Final Unit Cost
CE Forecast Unit Cost G/L
Once your data block is finalized, click Save at the bottom right of the slide out panel.
On the Add data blocks slide out panel, you will only see the Custom data blocks you create. Custom data blocks created by other users will only show up under their respective logins.
In the CBS register, select the Context Menu icon of the custom data block you created.
Select Choose columns from the context menu.
Add a new column to your custom data block.
Remove a column from your custom data block by selecting the header and clicking the left-facing arrow to return it to the left column.
To close the slide out panel, click the APPLY button on the bottom right of the slide out.
From any tab, on any column header, select the yellow arrow icon.
Select your desired operator from the first drop-down list.
Enter the value in the next field.
Select the next fields for filters logic and additional operator.
Select Apply. The pyramid turns yellow.
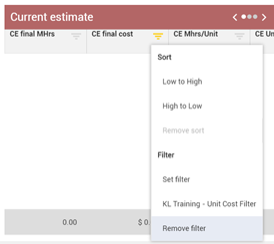
To clear the filter, select the same column header and yellow arrow.
Select Clear.
Click on the filter/sort icon and select Remove filter.
From the CBS register page, click on the View drop-down arrow.

From the Viewset drop-down list, select Save view as.
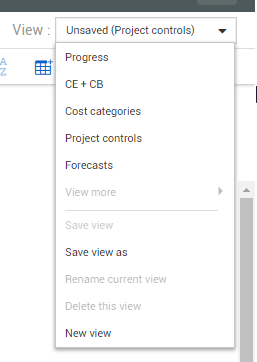
Name your view [your initials] – Saved view.
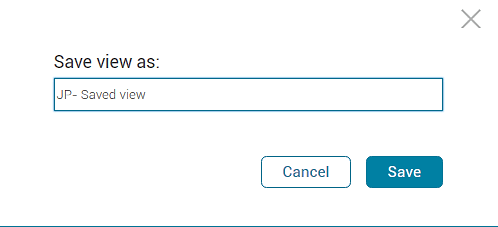
Click Save.
Additional Information
9977 N 90th Street, Suite 250 Scottsdale, AZ 85258 | 1-800-637-7496
© 2024 InEight, Inc. All Rights Reserved | Privacy Statement | Terms of Service | Cookie Policy | Do not sell/share my information